What is Inkscape?
Inkscape is a free tool for making vector images. You can import and export different file formats. Inkscape can create basic shapes and text for laser cutting at the Library. Plus, you can use more advanced Library software to fine-tune your Inkscape designs for laser cutting. Get Inkscape for free at https://inkscape.org/.
When you first open Inkscape, you will see a blank page, which is your workspace to change your workspace to match the materials you want to use
- Click file, then Document Properties.
- Set the exact size of your page or use one of the defaults.
- Change your measurements if needed (Inches, mm, pixels, etc.)
Press the exit box to exit the screen and apply your changes
The main menu in Inkscape on the left has tools for creating shapes, lines, text, erasing, and more. The primary tool is the select tool, which resizes objects. Hovering over a tool tells you what it does.
Tool tips:
- Use the arrow to adjust and resize sides of an object. Hold shift to maintain aspect ratio.
- Press the spacebar to switch between select and the last used tool.
- Undo actions by going to Edit -> Undo.
- Convert text to a path to avoid font issues: Select text, go to Path -> Object to Path.
In the top bar, you will notice the Object tab. This will help you to rotate, align (in Align and Distribute), group, and reposition your objects.
When you align your object, make sure that you align it to your page if it’s the design you want. You can also align objects to selected objects and shapes.
In the Path tab, you can perform unique operations on shapes, like combining them with union, or creating new shapes using Difference or Intersection.
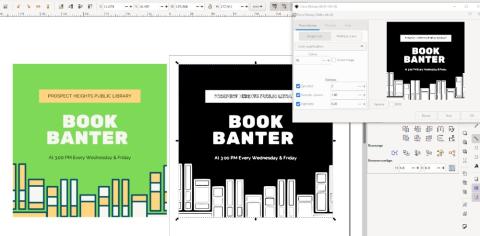
For tracing graphics to make them suitable for laser cutting, click Path, then Trace to Bitmap. You'll find options like brightness cut-off and edge detection. Click Help for details on each option. To preview your trace, click Update. For simple images, use a single scan; for complex ones, use multiple scans, but remember, more layers take longer to process.
Once done, move the original image to see the traced result. If you're not satisfied, adjust the settings until you achieve the desired outcome.
Trace Tips
- When it comes to tracing images, simple images are best, line art being the best option.
- The higher the quality the image, the better it traces (larger file size).
- Avoid small font letters, they do not often trace well. You are better using the type tool.
- If you have a really complex image (like a photograph), Inkscape can be difficult to use. If this is the case, bring in your file and we can set it up with more advanced PhotoLaser Plus software.
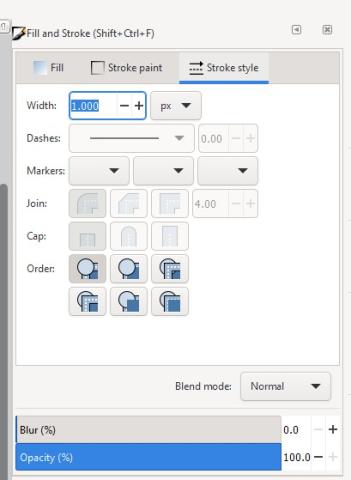
Your objects are not ready to be cut just yet, they still need to be set to either engrave or cut. To start, press Object tab, then Fill and Stroke. From here, you can change your fills and stroke thickness. This will determine whether your line cuts or engraves.
Any object you fill will be engraved when we send it to the laser. If it is not filled, it will only do the lines instead (which is another option).
To turn a line into a filled shape in Inkscape:
- Set strokes to a minimum of 0.5 pt (anything thinner will not engrave)
- Select your line and select Path > Stroke to path command
- Set all fill colors to: Black: RGBA: 0,0,0,255) (for glass, a dark gray is better)
Stroke Style is also important. It helps to determine if your line will cut or engrave.
For everything you would like to be vector engraved set the lines to:
- Stroke weight: to 0.5 pt
- (you can change colors of lines to help you keep them separate from each other)
For everything you would like to have laser physically cut all the way through draw your vector lines in:
- Stroke weight: to 0.2 pt or less
- Note that thin lines can be hard to see, so you may want to wait until you are done designing to set the thickness for vector cutting.
To submit an item to be laser cut, fill out our Book a Maker form online. Make sure to include what you would like to do and what materials you are using or need to purchase. When you arrive for your appointment, make sure to bring your svg file to be laser cut and any materials you need. You will pay for the item after it is completed if you use our supplies.
Note, only staff may operate the laser cutter.
Reference our “The Lab Price Guide” for prices of materials in The Lab


